I recommend using Hetzner or DigitalOcean for fast setup. This page is hosted on a Ubuntu $4/month VPS (4GB RAM, 2VCPU, 40GB DISK). After renting your VPS, you'll get an IP address to connect via SSH. If you don't have an SSH key on your local computer, follow these steps:
- Generate an SSH key on your local machine and copy it.
- Enter your SSH key when creating the server to enable passwordless login. If you don't know how, the next step will show you how, just on the rented VPS you just created, but you should do it on your own computer once too.
I'm using macOS. Open the Terminal app and connect to your server by replacing "IP" with the IP address you received from your server provider:
ssh root@IPOnce logged in, generate a new SSH key on your VPS:
ssh-keygenJust press Enter for all the default options.
Copy the public key using this command:
cat $HOME/.ssh/id_ed25519.pubPaste it into your GitHub SSH keys settings.
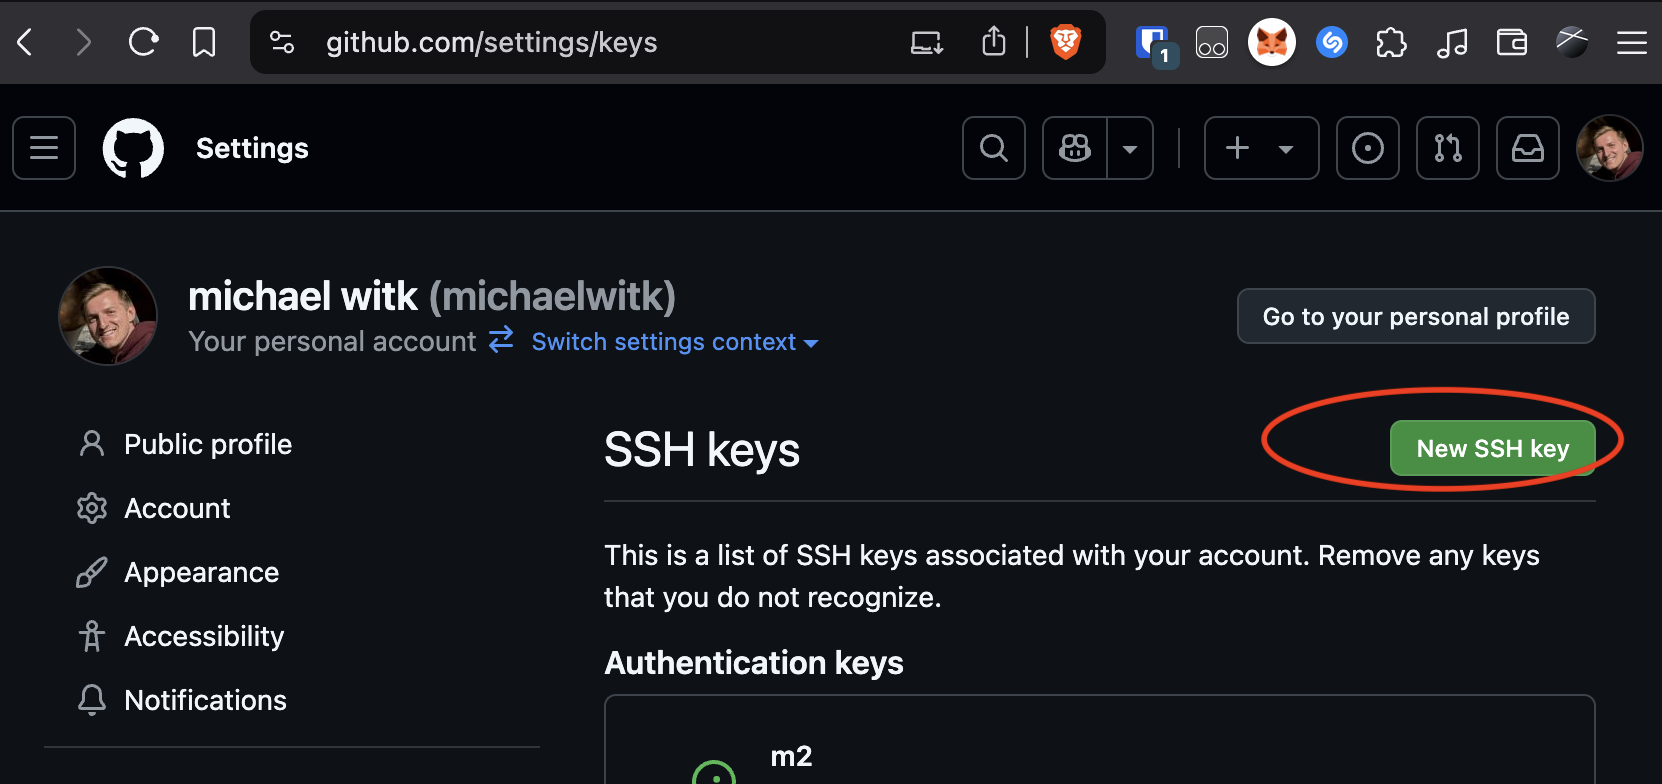 GitHub SSH key settings
Copy my minimal webhook webserver repository onto your VPS:
git clone https://github.com/michaelwitk/webhook
Create a new GitHub repository here and then update the Git configuration on your VPS:
cd webhook
rm -rf .git
git init
git add .
Now, follow the steps from GitHub to connect your repo to GitHub:
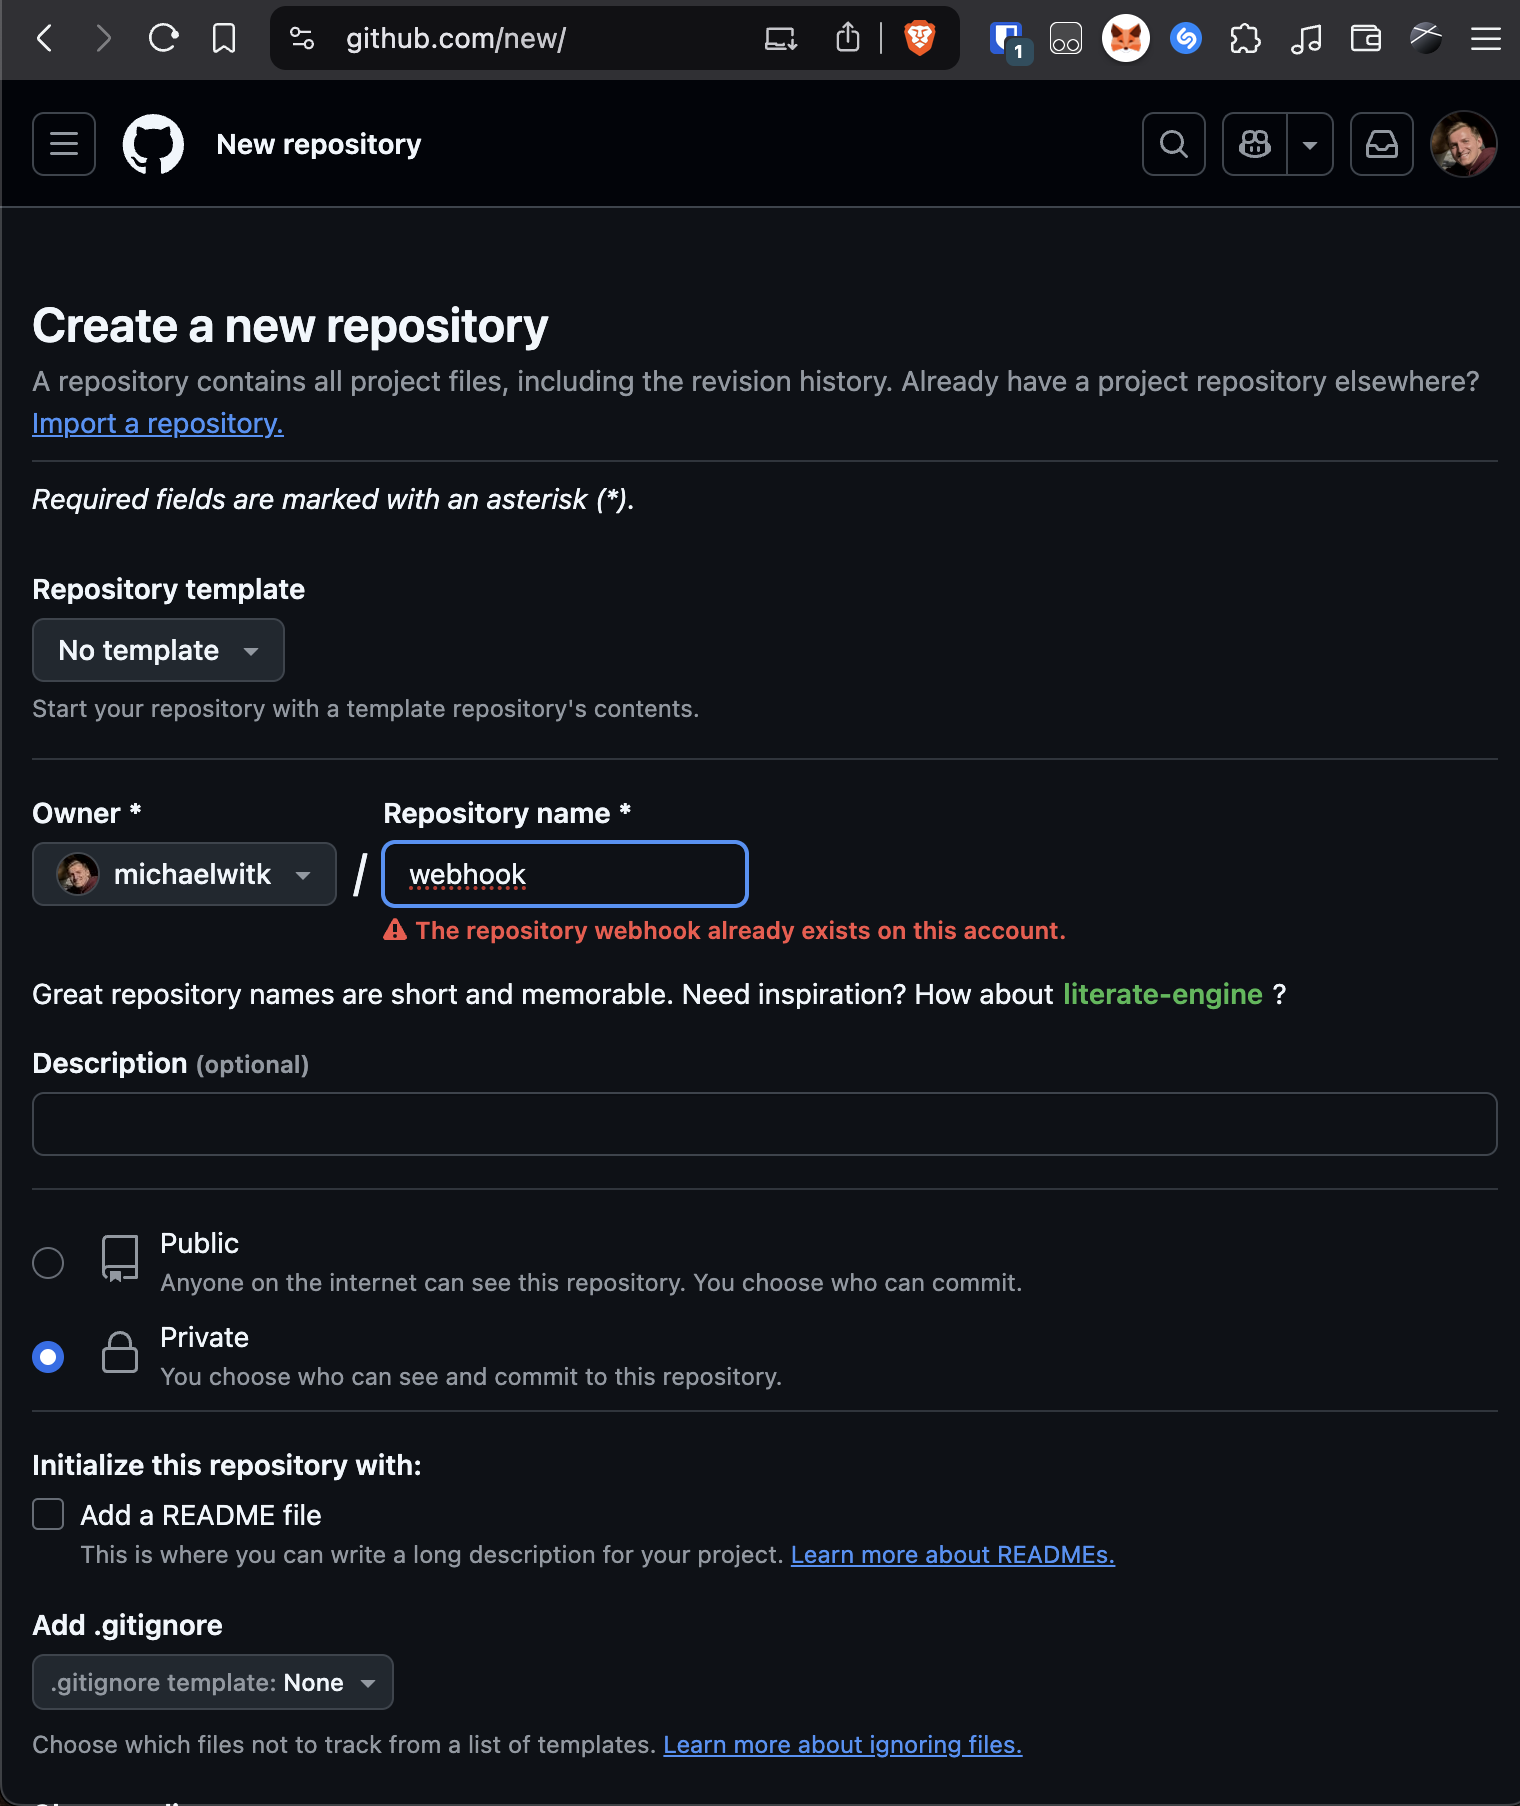 GitHub new repository creation page
 GitHub new repository created page
Use the provided snippet to upload my code to your own GitHub account.
After setting up the repository, go to the repository settings, then to "Webhooks". Enter your domain URL and set the content type to JSON. Write down a random secret that you'll later use in your .env file. You can reuse the same secret for future webhooks. I'm assuming you already have your own domain picked out that you'll want to use, we will configure it the next few steps.
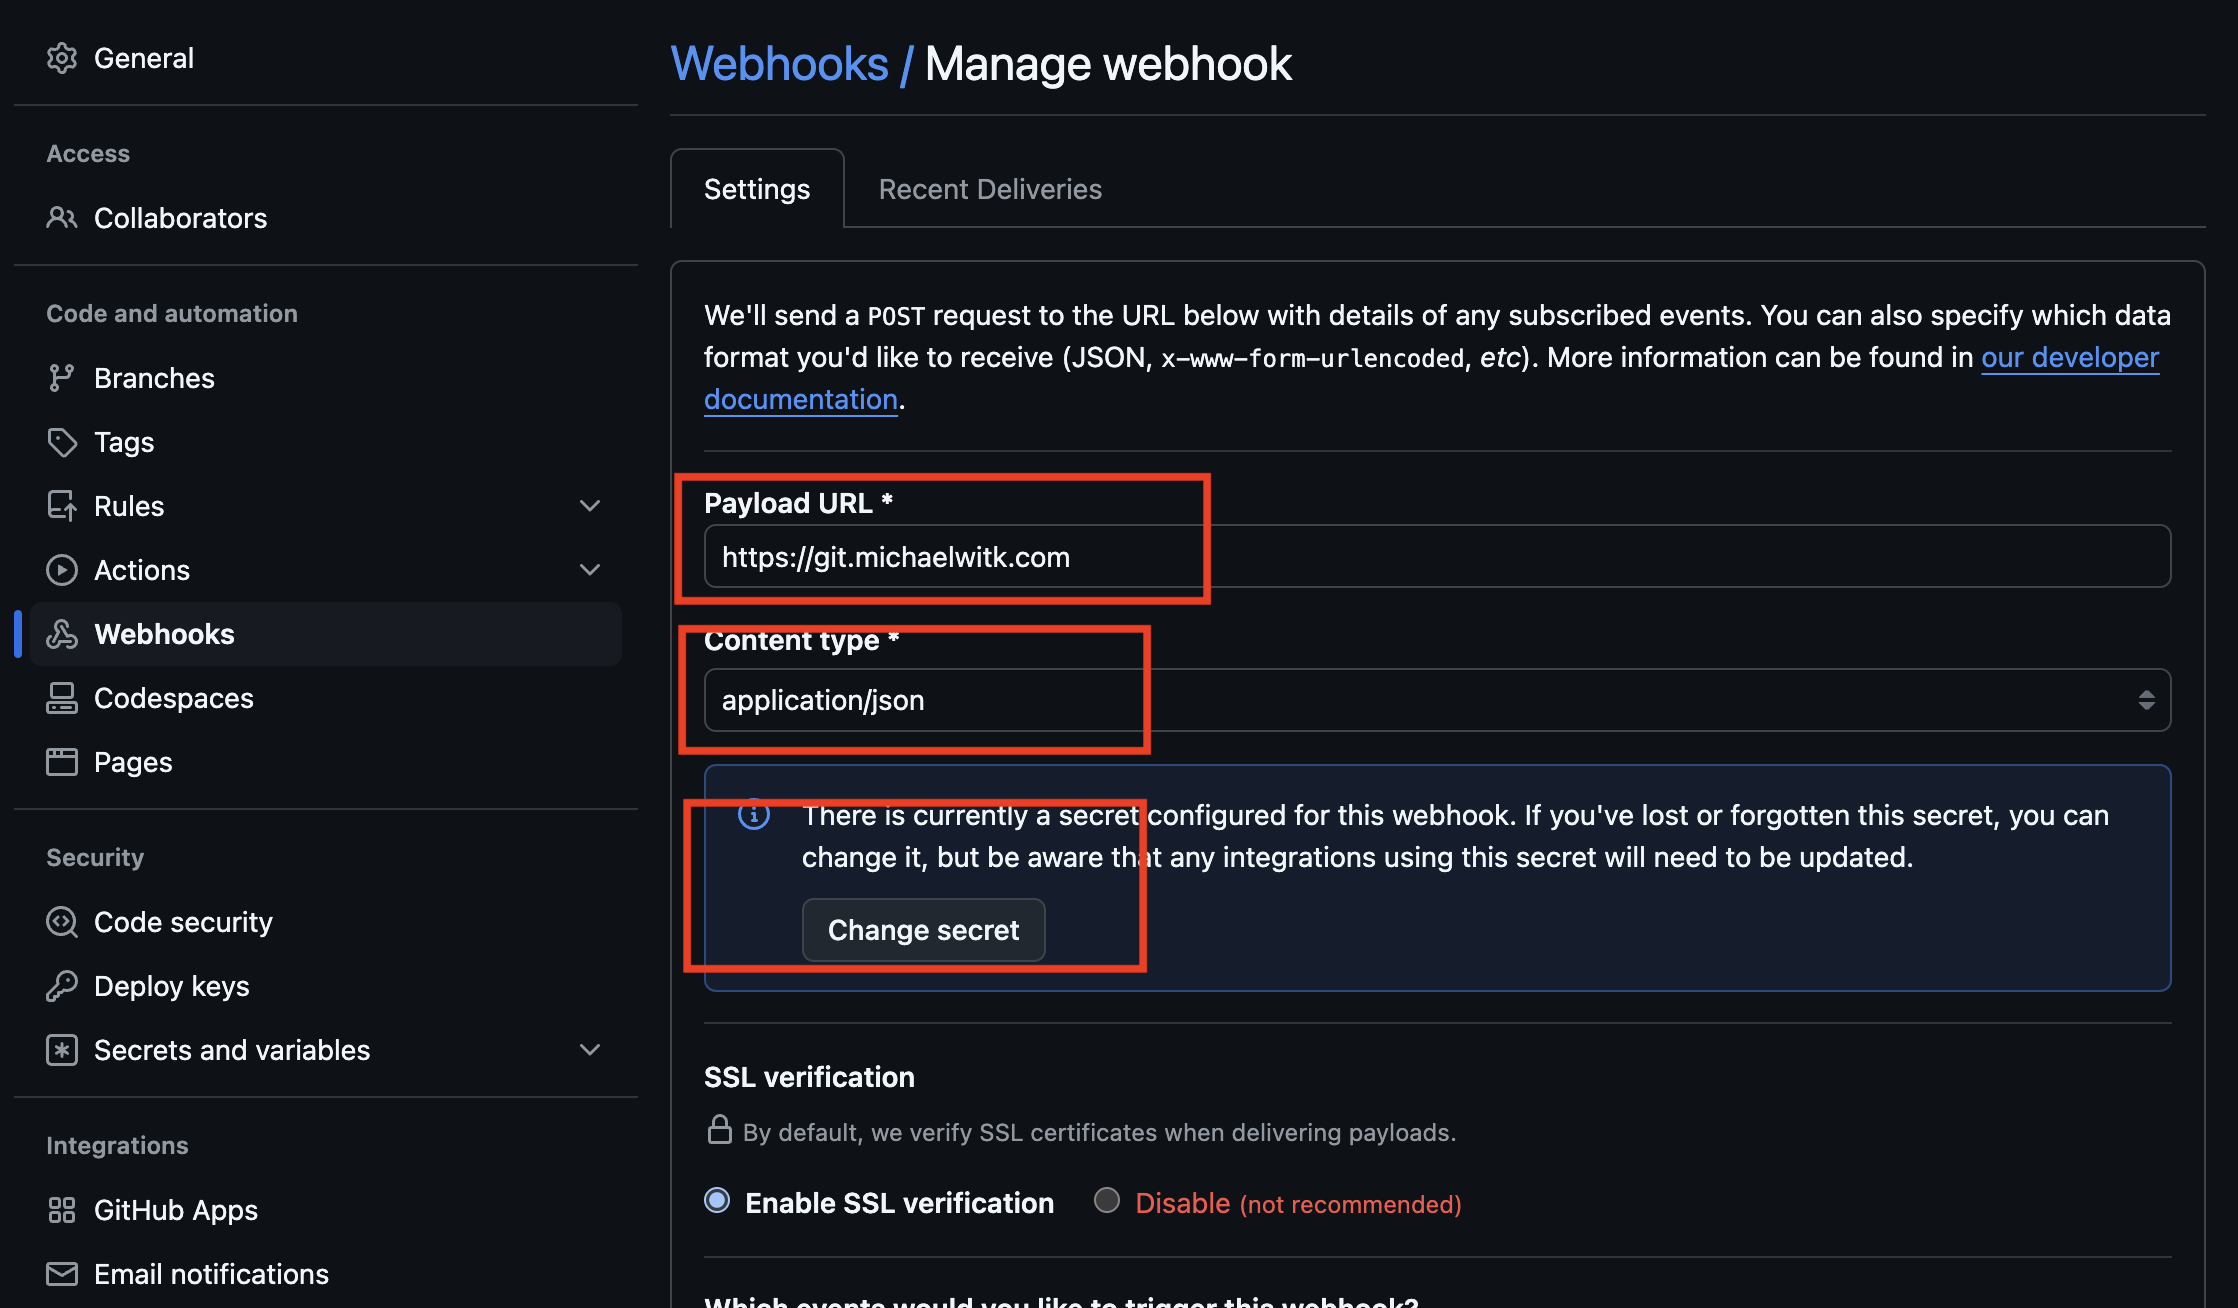 GitHub Webhook settings Page
It's recommended to use Cloudflare to protect your server's IP address from exposure. With Cloudflare, your server is shielded from direct traffic. Purchase your domain on Namecheap, enable free WHOIS privacy to keep your name and address private. Now sign up on Cloudflare and add your domain and pick free tier. Cloudflare will tell you which Nameservers to enter into Namecheap Domain Settings under Nameservers -> Custom DNS.
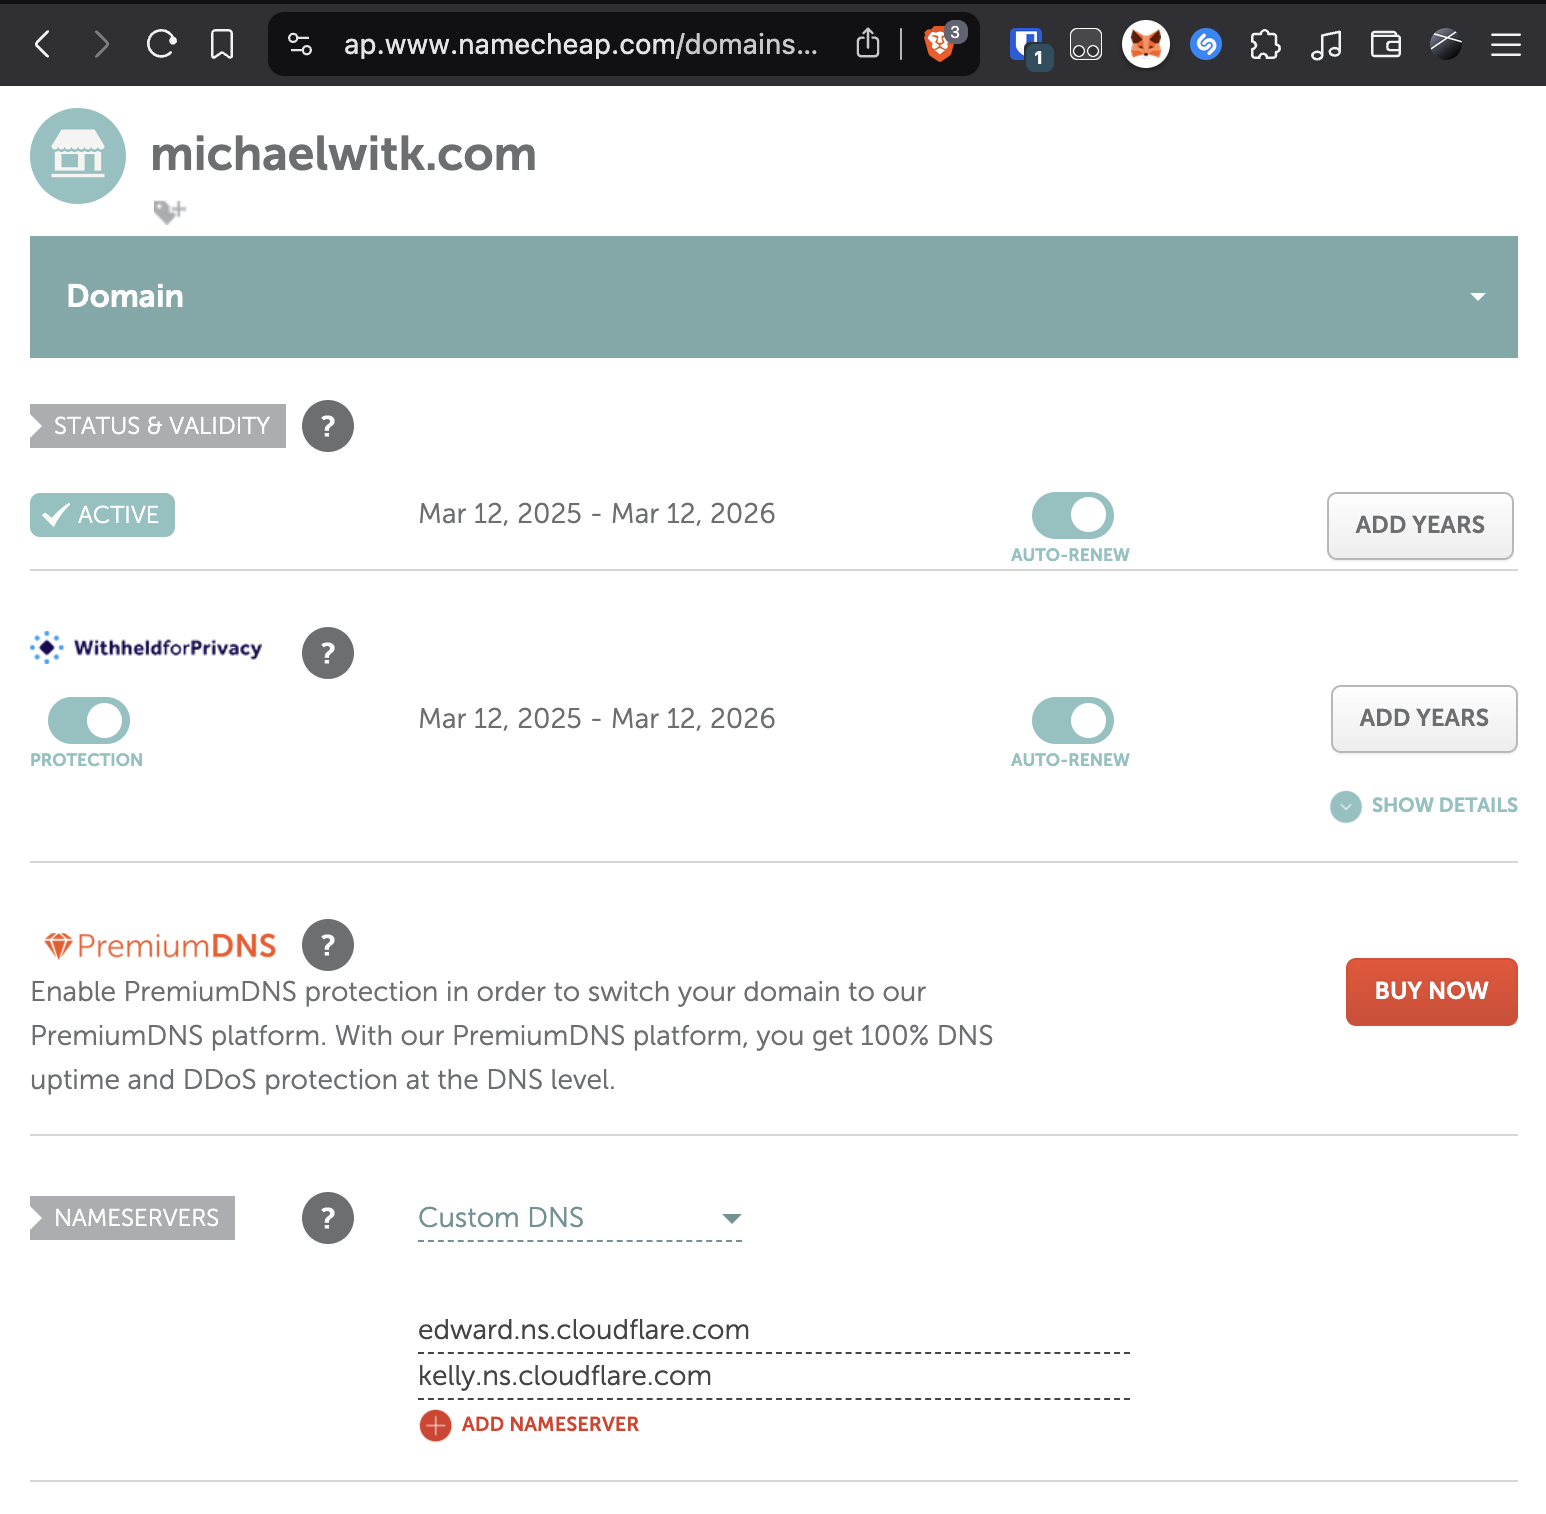 Namecheap Domain Settings Nameservers
Add two A records: @ and * pointing to your server's IP on Cloudflare. Ensure that the orange cloud is enabled.
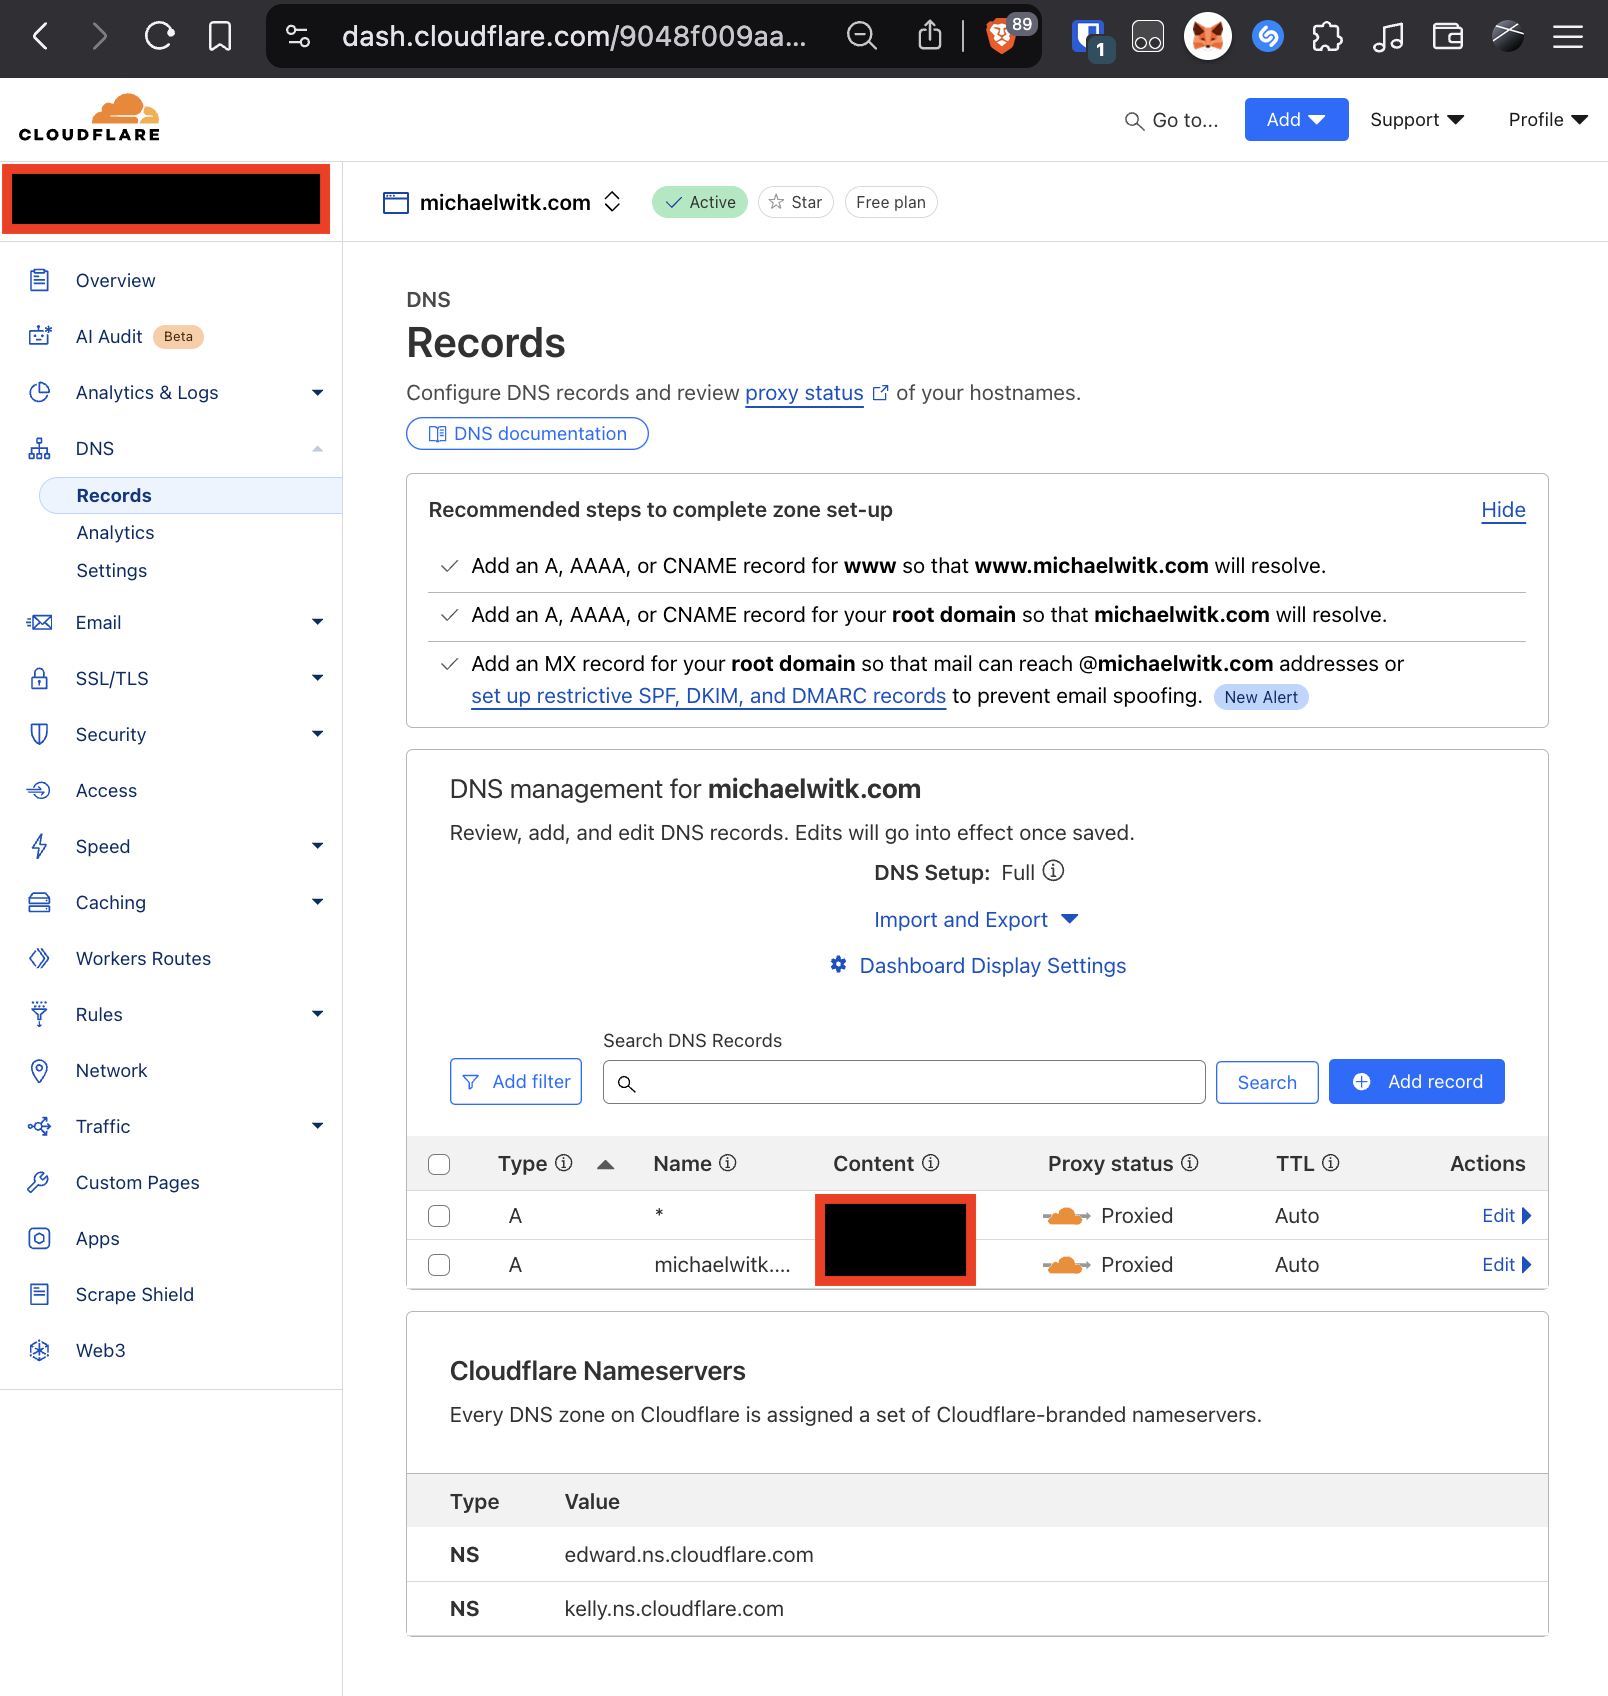 Cloudflare DNS Records Page
Set Cloudflare's SSL/TLS encryption mode to "Full (Strict)" for added security. It tells cloudflare to always choose a secure connection even when talking to your server, this should be the default.
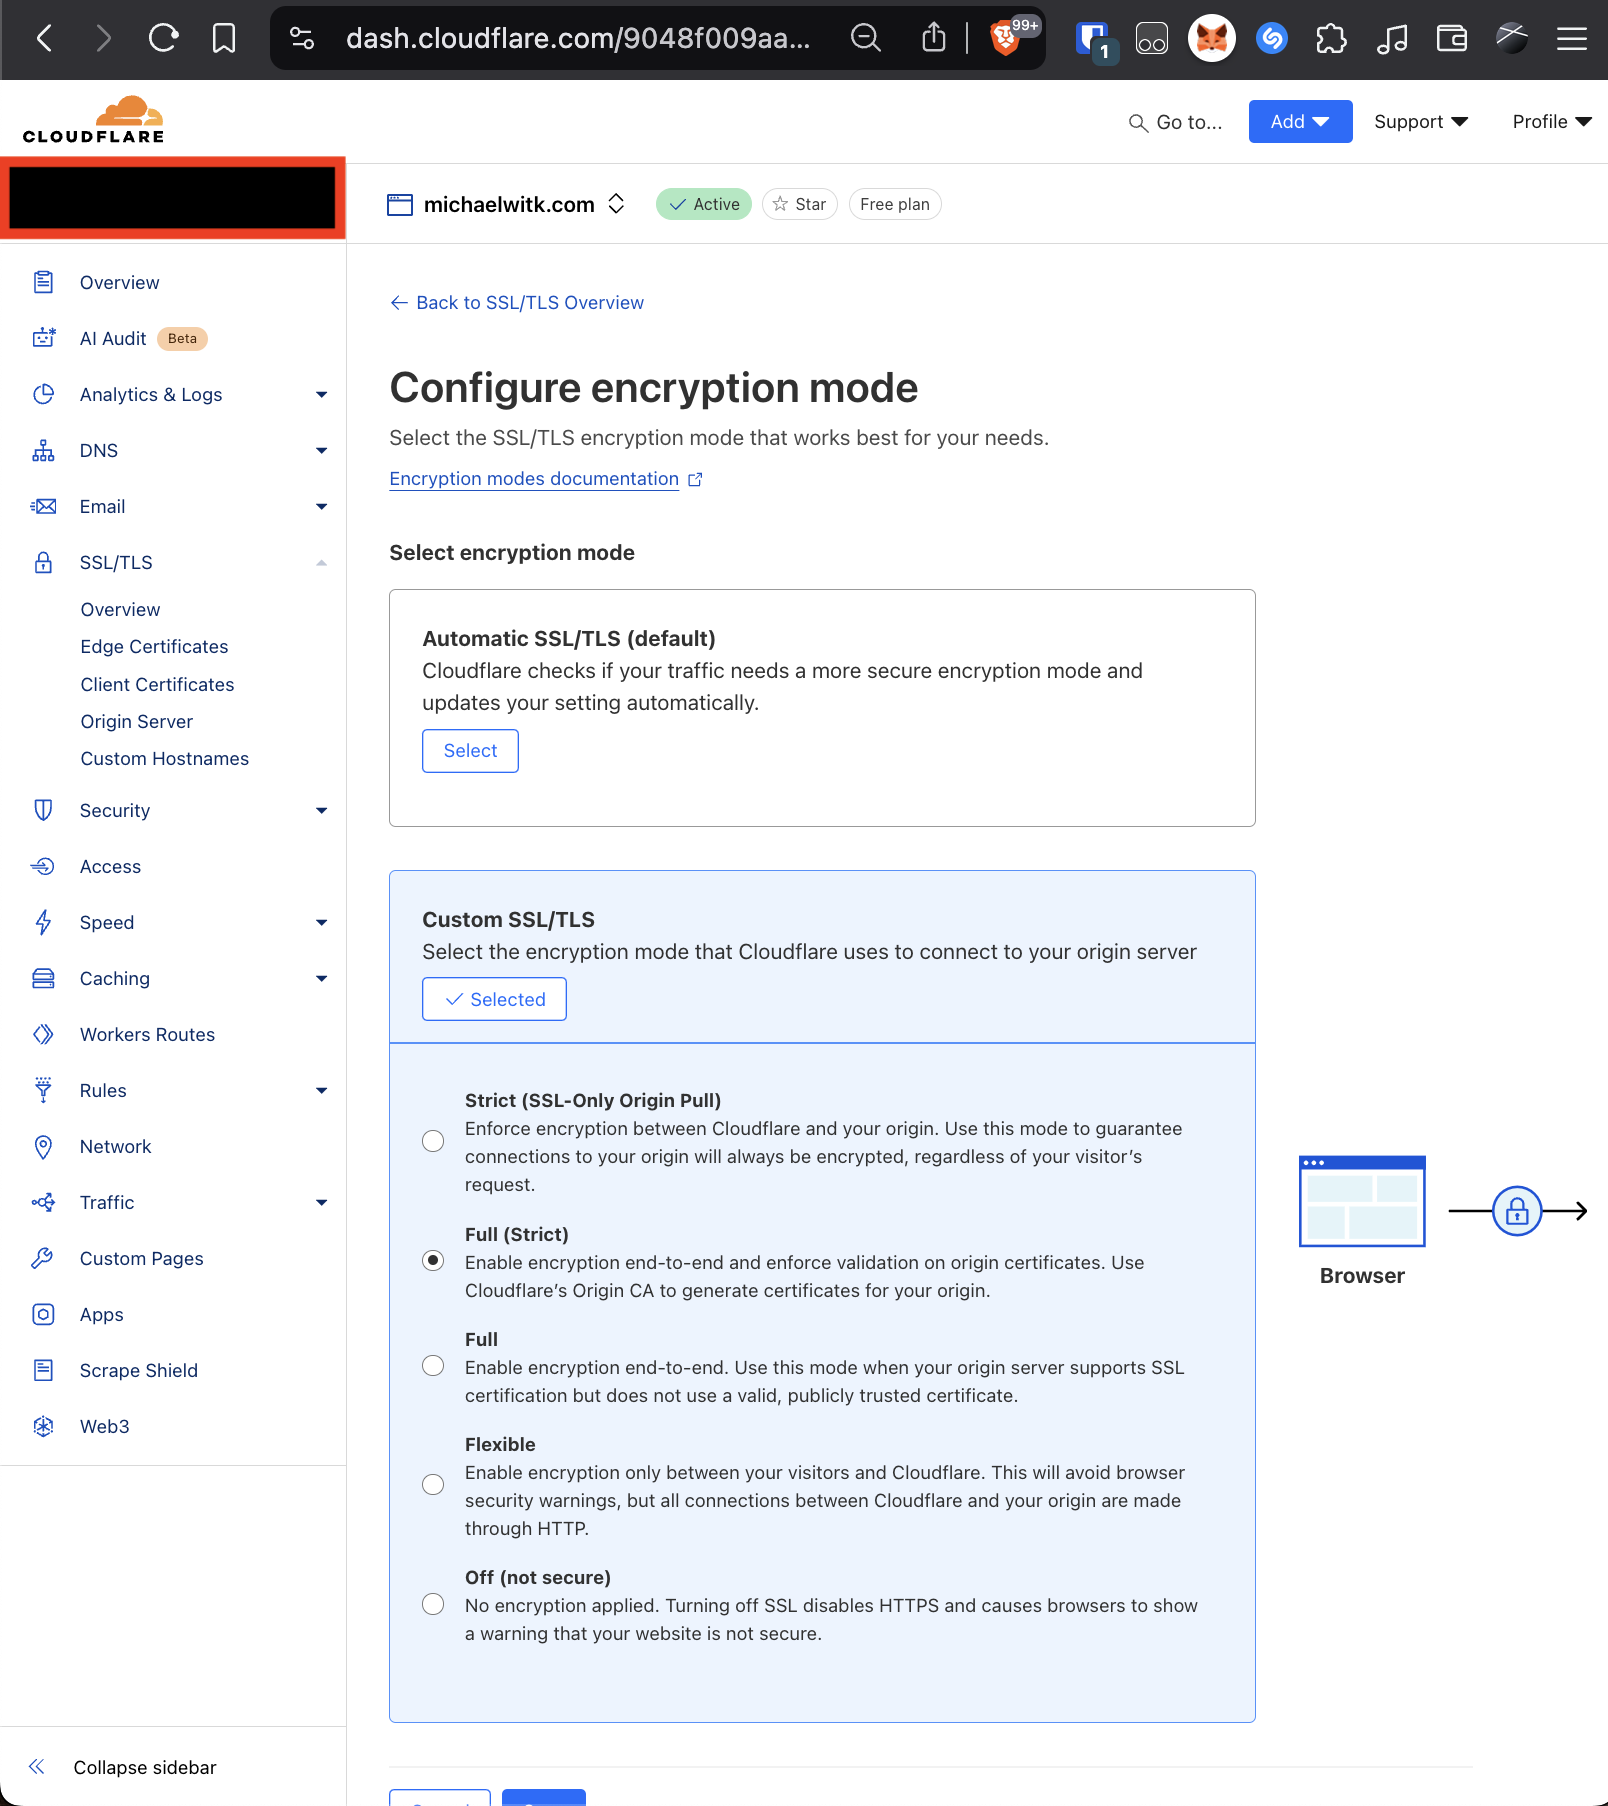 Cloudflare SSL Settings Page (Full Strict)
Install Nginx (webserver) and Certbot (for https) on your VPS:
sudo apt update
sudo apt install nginx -y
sudo systemctl enable nginx
sudo systemctl start nginx
sudo apt install certbot python3-certbot-nginx -y
For each domain or subdomain, create a configuration file under /etc/nginx/sites-available/git.michaelwitk.com. Here's an example for the webhook application:
server {
    listen 80;
    server_name git.michaelwitk.com;

    location / {
        proxy_pass http://localhost:3000;
        proxy_http_version 1.1;
        proxy_set_header Upgrade $http_upgrade;
        proxy_set_header Connection 'upgrade';
        proxy_set_header Host $host;
        proxy_cache_bypass $http_upgrade;
    }
}
Enable the configuration with the following commands, switch up the variables as necessary:
EMAIL=mwit2023@gmail.com
DOMAIN=git.michaelwitk.com
sudo ln -s /etc/nginx/sites-available/$DOMAIN /etc/nginx/sites-enabled/
sudo nginx -t
sudo systemctl restart nginx
sudo certbot --nginx --agree-tos --no-eff-email --non-interactive -m $EMAIL -d $DOMAIN
Set up a cron job to renew your SSL certificates:
sudo crontab -e
0 0,12 * * * certbot renew --quiet
Install Node.js using NVM (Node Version Manager):
curl -o- https://raw.githubusercontent.com/nvm-sh/nvm/v0.40.2/install.sh | bash
Restart your terminal to load NVM, then install your preferred Node.js version:
nvm i --lts
# nvm i 22
PM2 helps manage your applications and automatically restarts them if they crash or the server reboots:
npm i -g pm2@5.4
pm2 install pm2-logrotate
For each app, clone it onto your VPS and start it using PM2. The webhook script will restart your pm2 app when a HTTP POST comes in from GitHub that we set up earlier. The name of your repo must match the folder. See example deployment below and remember to assign a unique port for each app, and have Nginx config match your desired (sub)domain:
cd $HOME
git clone https://github.com/michaelwitk/webhook
cd webhook
# Create .env file with your secret from GitHub webhook settings
# nano .env
echo SECRET=1234 > .env

# Node.js app (single process)
NAME=webhook
pm2 start "PORT=3000 npm run start" --log-date-format "YYYY-MM-DD HH:mm:ss" --name $NAME

# Next.js app (multi-process)
NAME=blog
PORT=3001 pm2 start ./node_modules/.bin/next -i 2 --log-date-format "YYYY-MM-DD HH:mm:ss" --name $NAME -- start

pm2 save
pm2 startup
Use the following commands to monitor logs and stats:
pm2 monit
pm2 logs
cat $HOME/.pm2/logs/webhook.log
or use vscode with ssh-remote extension to have a UI you're probably used to.